
You may have been doing a lot of work with the Amazon Template, prepping your items for upload into your Seller Central account. (And, yes, it can be a lot of work.)
You’re not quite done, yet, though.
In addition to adding items to Amazon, you need to tell us what to ship when we see orders containing those items, since you’re creating your own unique SKUs for each listing.
That’s where the SKU Translator comes in. The Translator basically tells us, “When you see an order for Amazon SKU ABC-123, send some specified Supplies Wholesalers’ parts.”
And while the SKU Translator may seem like additional work, it actually provides you with several benefits:
- It allows you to create custom bundles. Since you can make up any Amazon SKU you want, you can create custom bundles or multi-packs, and simply designate them in the translator.
- It allows you to list non-Supplies Wholesalers products in your store. Since you’re telling us specifically what we should be shipping, it allows you to list other products we don’t carry, simply by not including them in the SKU Translator, which tells us it’s not something we should be trying to fulfill.
- The other bit of good news- the SKU Translator takes very little effort to build and maintain. You should be able to put it together in 5 to 10 minutes, assuming you already have your Amazon Template built out.
So… let’s take a look at the format of the file, and then we’ll walk through each field.
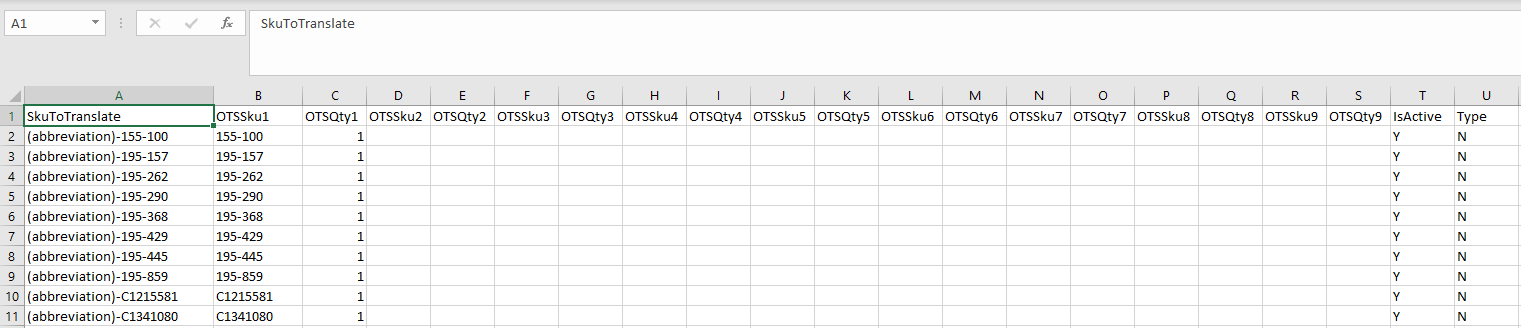
A couple of things to note: This is a .csv file (comma separated variables). Even though it may open in Excel, it needs to be saved as a .csv file to work correctly. The first row is the header row. That row needs to be there, and you shouldn’t change any of the values in that row.
Now let’s look at each column:
- SkuToTranslate. This is where you will put the Amazon SKU for the products you’re adding. If you’re setting this up for the first time, simply copy the values from Column B (item_sku) of the Amazon Template you’ve created.
- OTSSku1 – OTSSku9. In these fields, you list the Supplies Wholesalers SKU(s) associated with the Amazon SKU in Column A. If the Amazon SKU has more than one unique Supplies Wholesalers part associated with it (for example, if you’re selling a bundle, and want to send out black, cyan, magenta, and yellow cartridges when they order the bundle), place the first SKU in OTSSku1, the second SKU in OTSSku2, etc.
- OTSQty1 – OTSQty9. Enter the quantity of the part number in the corresponding OTSSku column (OTSQty1 matches with OTSSku1, etc.) you want us to send when the associated Amazon SKU in Column A is ordered.
- IsActive. This field allows you to activate / deactivate SKUs as needed. If you want the SKU to be live on Amazon, enter a ‘Y’ here. To inactivate / delete a SKU, enter an ‘N’ here.
- Type. This tells Supplies Wholesalers if this is a Prime-enable product or not. If you wish to use the Prime shipping template in your store for this product, enter a ‘P’. Otherwise, enter an ‘N’.
The First Upload
Once you’ve built your SKU Translator for the first time, log into your account at https://fbsw.supplieswholesalers.com and click the ‘SKU Translator’ button at the top.
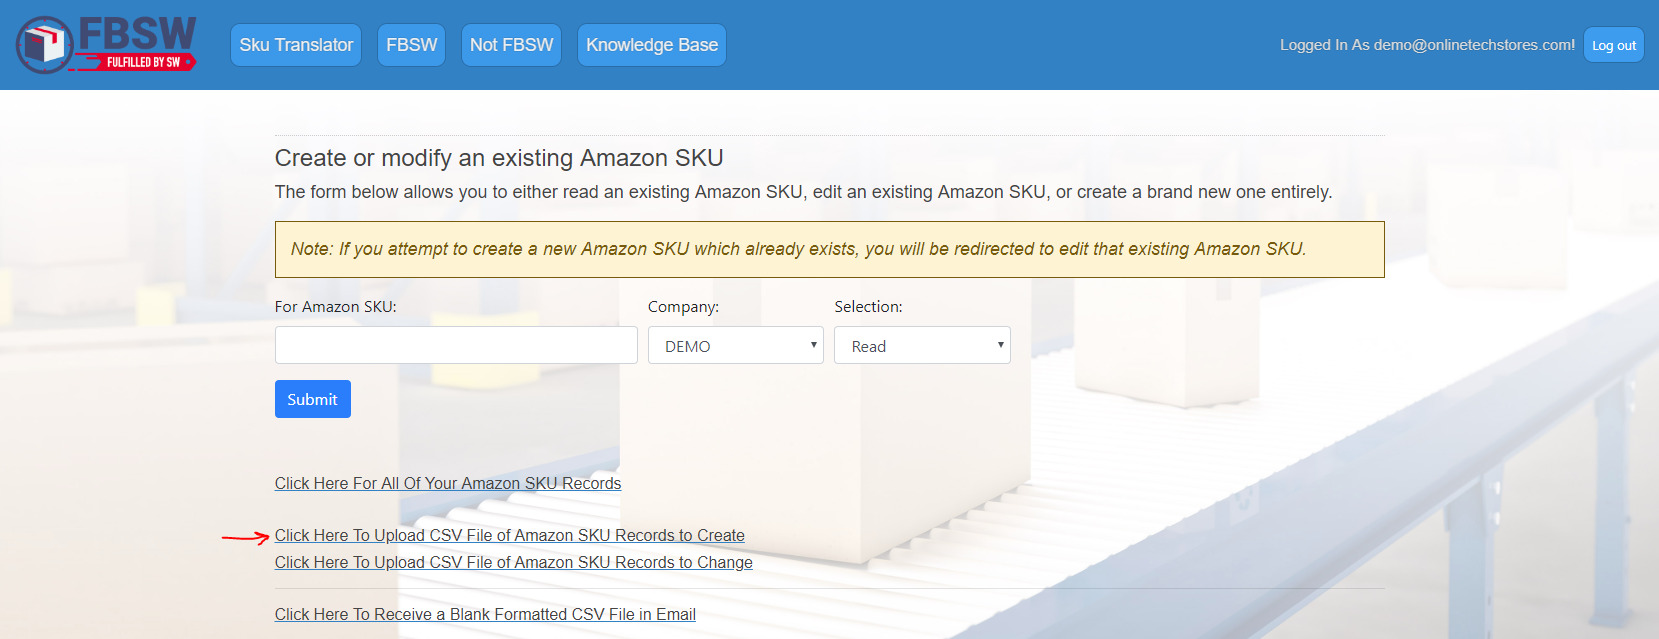
Click ‘Click Here to Upload CSV File of Amazon SKU Records to Create.’

Click ‘Choose File’ and select your translator CSV file.
Click ‘Upload.’
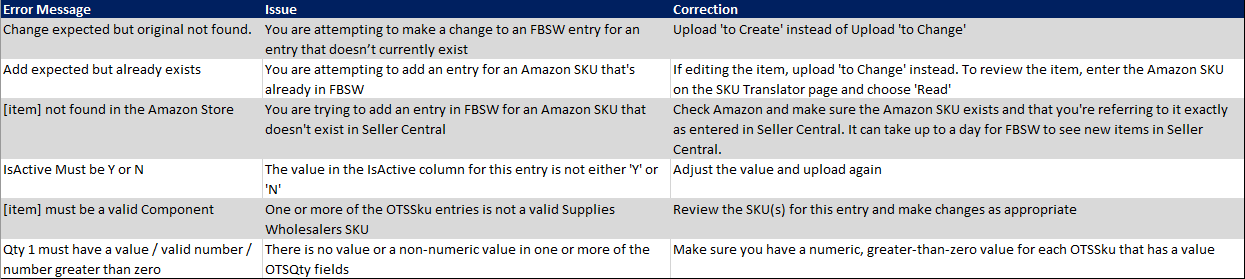
Once the file is uploaded, you may get an error file emailed to you. If so, make sure to open it and review it for items needing correction. You may see any of the following errors:
Future Uploads
Once you’ve uploaded your products the first time, there are several reasons you might interact with the SKU Translator:
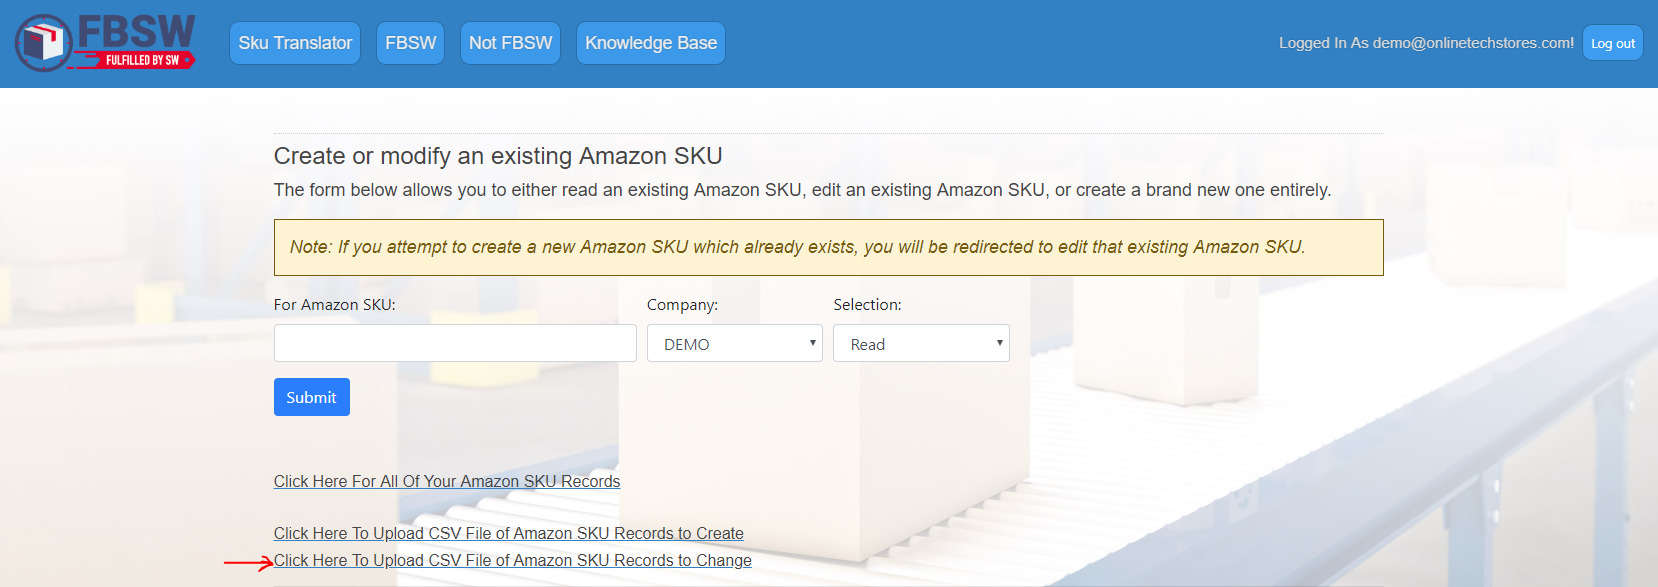
Correcting existing listings. If you need to make corrections to existing listings, you can make changes to the SKU Translator file, then upload using the ‘Click Here to Upload CSV File of Amazon SKU Records to Change’ option.
Add more listings. To add new products, add the items to the bottom of your of your SKU Translator file and upload using the ‘Click Here to Upload CSV File of Amazon SKU Records to Create’ option.
NOTE: You cannot update and create at the same time. If you have both updates and new files, upload the file twice: once under ‘…to create’ and once under ‘…to change’
Working with Single Entries
In addition to bulk uploads, you also have access to an interface to add / update single entries.
Adding a new listing. Type in the Amazon SKU you’re adding in the appropriate box, make sure your company name is showing up in the ‘Company’ dropdown, and then choose ‘Create New’ as the ‘Selection’ choice and click ‘Submit.’
NOTE: You’ll have to add your item to the Amazon at least several hours before trying to add it to the translator.
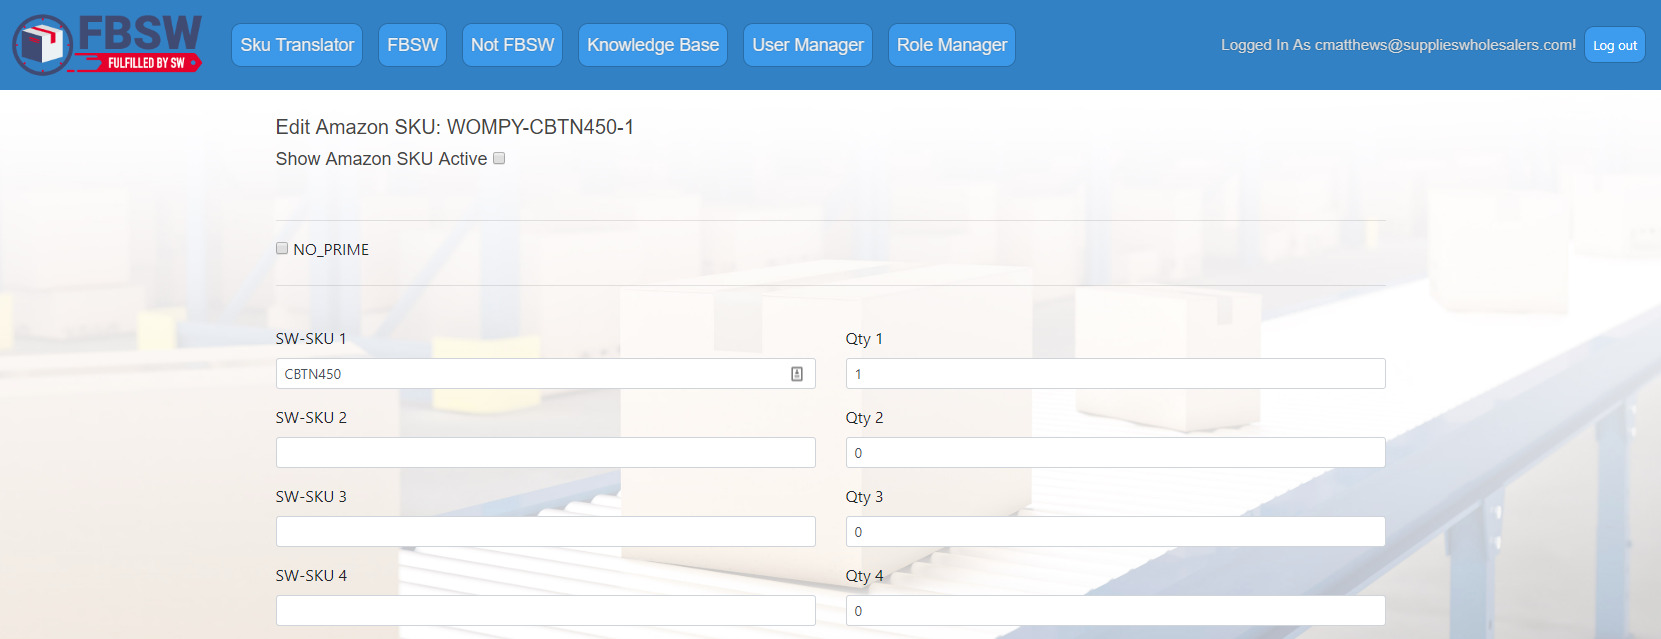
While laid out a little different than the file, all the same fields are here. Check the ‘Active’ box, the ‘NO_PRIME’ box (if this is *not* a Prime item), and fill in the SW-SKU and QTY fields as appropriate.
Updating existing listing. Type in the Amazon SKU you’re adding in the appropriate box, make sure your company name is showing up in the ‘Company’ dropdown, and then choose ‘Edit’ as the ‘Selection’ choice and click ‘Submit.’
You will see a screen like the one above (with everything filled out). To make changes, adjust the appropriate fields as needed, and click ‘Submit.’